#LETSTALKABOUT COVID-19 Coping Tips + Tricks

Times are tough right now as COVID-19 wreaks havoc on communities across the globe. If you’re feeling anxious, nervous, angry or scared that’s normal—give yourself some space and grace to process what you’re feeling. Here are some tips + tricks I’ve been using to keep my mental and physical well-being in check in the midst of it all. I hope it’s helpful to you.

_DSC8066.JPG
  1. Read a book! You can check out many a free book from the public library system using your Kindle device or the free Kindle app if you don’t have a device. Let yourself get lost for a while in another story—it can be a balm for the soul .

  2. Spend some time in the kitchen, trying new or favorite recipes that nourish your body and mind. If you’re looking for inspiration, there are many free recipes on websites like Allrecipes or Food Network. If you’re running low on supplies, check out Supercook where you can receive recipe suggestions based on items you already have in your pantry!

  3. Move your body! There are numerous online resources for free, online workouts that you can stream from the comfort of your home. Don’t hesitate to modify the activities as needed for your body and space and remember you can get creative with things in your home if you need weights (bottle full of water? backpack full of water?) or other equipment.

  4. Clear your mind. There’s a lot going on and a lot to take in. When the noise in your head gets to be too much, consider a guided self meditation. The fine folks over at Headspace have made a bunch of meditations available for free. A personal favorite of mine is called Healing Street from the New Paradigms podcast and at 17 minutes long, it’s easy to sneak into every day as needed.

  5. Phone a friend. Sound social distancing techniques may caution against seeing the people you love outside of your home, but you can always hop on the phone or set up a video chat. There are a number of free phone and video chat services available, though some do limit the number of people who can join at one time. Check out Google Hangouts, Whatsapp, Facebook Messenger, and even Instagram Chat so you can see the people you love in real time.

  6. Consider adding a fur friend to your family! Although many shelters and rescues are closed to the public, they are still accepting applications for adopting and/or fostering animals in their care. If you’re able, now is a great time to add a fur friend to your life. They bring so much joy and comfort and there are so many of them just waiting to find their forever home.

  7. Sign up for a CSA (community supported agriculture) box from a local farm. You can have fresh produce delivered to your home, cutting down on the need to visit grocery stores while also supporting a local business. This means you’ll also be leaving resources untouched for folks who aren’t able to access this service and it’s an all around win. Click HERE to find a CSA service in your area.

  8. Support local businesses if you have the expendable income to do so. Local wineries, breweries, and other restaurants are offering pick-up and delivery services. Other professionals have switched to online forums to share their services and wares. You can hire someone, purchase a gift card or certificate for future use, and make an impact.

  9. Get offline. There’s a fine line between staying informed about the latest updates and consuming so much information that it begins to impact us negatively. If you start sliding into the latter, take a break. Take a walk. Drink some tea. Do a little virtual yoga. Whatever feels healing and good to you.

Do you have other tips and tricks to offer? I would love to hear them!

#LETSTALKABOUT Winter Trip Planning

I’m a year round adventure enthusiast, meaning the grey days of winter don’t stop me from getting outside. But, trip planning takes a slightly different turn during the winter when shorter days, inclement weather, and overall conditions dictate a more careful approach. Whether you’re planning an adventure for yourself or getting some loved ones outside, here are some things to consider:

DSC_1562-2.jpg

Snow Travel:

If you’ll be traveling on snow, expect to halve the amount of distance you can usually travel in a given time. We all have that one friend who’s positively beastly on the uphill no matter the conditions, but most people can expect to slow down, whether for navigation purposes or simply because snow can be more difficult to walk in.

Road conditions and closures:

Check for seasonal and weather-related road closures before you head out. There’s nothing worse than driving for hours only to find that you can’t make your destination. Also, keep an eye on road conditions. Ice and snow buildup on roadways can make driving more perilous. Go prepared with chains per your car manufacturers instructions (and the knowledge to install them) and take it easy on sharp corners. When in doubt, slow down and try to avoid smashing the brakes.

Avalanche terrain:

This one is key. Many beloved summer hikes pass through avalanche terrain and it’s critical to be aware of this as you plan your trip. In the Cascades, avalanche terrain means slopes between 30-50 degrees. On high risk days, the best thing you can do is avoid traveling on or below said terrain to prevent any avalanche-related accidents. Check the avalanche forecast from Northwest Avalanche Center (or your local forecaster) before you get out, and make safe decisions. Consider using a mapping tool like CalTopo to decide which areas are safe, and which you should avoid.

Navigation:

As the snow drifts in, landmarks become obscured. Make sure you have a map of your destination, and know how to use it so you can safely navigate. Electronic GPS devices are also helpful, but remember that cold temps can zap battery life, leaving you in a pickle if you don’t have a backup plan.

Traction:

Conditions change swiftly in the mountains, so go prepared with traction devices regardless of what the latest trip report says. Check out this post to learn more about choosing traction devices, and get after it safely. I keep a pair of microspikes in my pack all winter long and they’ve saved me on many an icy trail.

Shelter:

If you’re a firm proponent of the 10 Essentials you know that an emergency shelter is on the list. Many folks go a little lax on this one in the summer with warmer temps and additional resources to construct a shelter should an unexpected overnight occur. However, it’s crucial to be prepared in the winter, especially if you know you’re pushing your ability to hit a given objective in a day. An emergency bivy is relatively cheap, light and can be life-saving in the event of an accident. Plus, who doesn’t look good in metallic foil?

Food + Water:

Breaking trail and staying warm in the winter is hungry business. Make sure you go prepared with adequate snacks to fuel your body when you get out. Similarly, remember to stay hydrated. It’s easy to forget you’re thirsty when the cool temps drop and crucial to keep drinking so you don’t bonk. Bonus tip: bring a lightweight stove and some hot cocoa or tea and have a warm treat when you reach your destination!

Layers:

They are your best friend in the winter. As you begin to sweat, strip a few off to prevent your warm, down layers from getting wet but be sure to protect your skin from exposure. When you pause at your destination, layer back up to stay warm. Remember, it’s easier to stay warm than to get warm.

File a trip report:

Make sure you tell someone where you’re going and when you expect to get back before you go out. If something goes wrong, you’ll want to know that you have someone at home looking out for you, prepared to call for help on your behalf.

Wherever you’re off to, stay safe and have fun. It’s a beautiful time of year!

#LETSTALKABOUT the 10 Essentials

Pop Quiz: what are the 10 essentials?

IMG_2084.jpg

Palms sweating? Brow furrowed in confusion? Fear not, I’m here to help!

The Ten Essentials is a list of gear meant to keep you safe as you get outside, especially in the event of an accidental overnight or emergency. The list has been updated with modern information since it was first created and contains the following:

  • Navigation: Map, altimeter, compass, GPS device or app, PLB or satellite communication device and a backup battery pack for charging.

  • Headlamp: Plus extra batteries.

  • Sun Protection: Sunglasses, sun-protective clothes, and sunscreen. Double check local regs: some destinations require “reef-safe” sunscreen.

  • First Aid Kit: Don’t forget blister and foot care as well as bug spray.

  • Knife: Or a multitool.

  • Fire Starter: Matches, lighter and tinder, or stove as appropriate for your adventure.

  • Shelter: Carry at all times but feel free to adjust for the season and terrain you’re adventuring on.

  • Extra Food: At minimum, one extra day of food is recommended. More if you know you’re going into a more risky or remote location and weight allows.

  • Extra Water or Water treatment ability: Carry more than you think you might need if weight allows, or make sure you have access to a water treatment device or tabs.

  • Extra Clothes: Think layers. If you need to hunker down, you’ll want to stay warm.

Bonus items:

  • Extra Medicine: this is particularly important f you take something that will result in additional risk to your health if you skip it. Example: blood pressure medicine, insulin, etc.

  • Eye Care: if you wear contacts or glasses and are dependent on them for safety, have a plan for how to store your contacts safely overnight should you need to.

Questions or comments? Let’s hear them!


#LETSTALKABOUT Washing Gore-Tex Pieces

Similar to the last post about washing your down pieces, there’s also a common misconception that you should never wash your Gore-tex jackets and pants.

DSC_0922.JPG

Fact check: you should.

Appropriate washing actually prolongs the life of your Gore-Tex pieces while increasing their efficiency and given the financial and environmental cost involved in producing and procuring them—you wanna keep those babies in prime shape!

Here’s how you do it:

  1. Check the manufacturer for specific information about your product.

  2. Carefully examine for holes or other defects, and be sure to empty your pockets and remove any special trims, like detachable faux fur hoods, etc.

  3. Take note of any holes and repair any that seem like they might tear further if put through the wash, using tenacious tape or another Gore-Tex compatible patch (note: you may eventually want to send the piece off for professional repair services from the manufacturer or a local shop, but this will do for washing).

  4. Zip all the zipper shut and fasten any straps and flaps shut to prevent tear and snagging in the machine.

  5. When you’re ready, put your pieces into the washing machine but don’t overcrowd it. Load the machine with your tech-wash of choice, and set it to permanent press, warm.

  6. When the cycle completes, shake off any excess water then pop the pieces into the dryer on a warm setting. Once they are completely dry, let them run for 15-20 minutes on tumble to reactive the durable water repellant (DWR) coating on the outside. Note: if the garment doesn’t appear to be repelling water, you can also treat it with a DWR treatment to prolong its life. If you don’t have access to a dryer, you can also iron the garment on low with a towel between the iron and the piece but proceed cautiously so you don’t melt your jacket! Probably worth dropping a few quarters at the laundromat!

  7. Voila! Your clean gear will be all the better for the TLC!

Things to consider:

  • Whatever you do, do not use bleach.

  • Spot clean any particularly dirty spots before loading the piece into the washer by applying tech wash with a toothbrush and gently scrubbing.

  • If you discover any dark, bubbled, or mottled spots on the underside of your garments, check in with the manufacturer. It might be delaminating (a separation of the layers), which means it’s time to bid the piece goodbye. But, be sure to check on warranties first as you might receive a replacement or credit towards the replacement of the piece depending on the manufacturer and age of the garment.

#LETSTALKABOUT Washing Down Pieces

Here in the Pacific Northwest, Winter is already rearing it’s head. I hate to sound histrionic, but with snow falling in the mountains and temps below freezing, it’s true. With storms in the forecast, now is a great time to shower your down pieces with a little TLC.

DSC_2939.JPG

Contrary to popular belief, washing your down pieces is critical to ensuring a long, efficient, happy life. With repeated use, oil, dirt, and other gunk accumulates on the feathers, decreasing their ability to loft and keep you warm. The solution? Wash them. Generally speaking, once a year should be sufficient to keep them in prime shape.

Here’s what you do:

  1. Look up the manufacturer-specific guidelines on washing your piece and take note of any mandatory information (ex: washing in cold versus warm water).

  2. Check all of your down pieces carefully for holes, patching any you find before you give them a wash. Bonus points: you might find a chapstick or $20 bill in a hidden pocket!

  3. Spot clean! If you find some particularly greasy spots, give them some extra loving attention. This is common around hoods, the opening of your sleeping bag, the ends of your sleeves, and the footbox of your sleeping bag. Grab your down cleaner of choice (we’re a Nikwax family) and apply with a soft bristled toothbrush, moving in a circular pattern until it dislodges. If this is the only dirty spot on your down piece, you can wipe off the cleaner with a damp sponge but if you’re washing the whole thing, don’t worry about removing the soap.

  4. Once your pieces are prepped, load them into a front-loading washing machine (don’t use a top-loading machine as they are prone to ripping the seams). Be sure that you don’t overload for max cleanliness.

  5. Load your down tech wash into the machine and select warm water and the gentle cycle, unless otherwise specified by the manufacturer.

  6. When the cycle is completed, remove your pieces and load them into the dryer, squeezing out any extra water if necessary. Toss in some down balls or tennis balls to assist in the drying process.

  7. Set the dryer to low heat and let ‘er rip. You should expect your down pieces to take several hours. If you check and there are clumps in the down, continue drying until your pieces are fully lofted and fluffy as can be. Clumps are usually a sign that the down hasn’t dried completely and are easily fixed with additional time in the heat. Whatever you do, don’t store your pieces until you ensure they are fully dry.

Voila! That’s it. Now store your lovingly washed items away until you’re ready to get out and get after it.

Things to consider:

  • Avoid fabric softeners or harsh chemicals like bleach.

  • Similarly, avoid dry cleaning unless you frequent an establishment that specifically launders sleeping bags and other technical gear.

  • If you discover holes or other defects that you can’t fix, consider contacting the manufacturer or a local gear repair shop. They can often fix things that you can’t, which is both wallet-friendly and environmentally responsible.

#LETSTALKABOUT Hiking in Trail Runners

I recently posted this photo in a local hiking group:

Check those shoes, which safely brought me to Everest and Annapurna base camps during my month in Nepal.

Check those shoes, which safely brought me to Everest and Annapurna base camps during my month in Nepal.

It’s a picture of me, at Everest Base Camp in Nepal. Almost immediately after I posted, the comments began. “I don’t think that’s approved footwear.” “Why aren’t you wearing boots?” “Wow, I can’t believe you did that in trail runners.” “You’re an idiot for those shoes.” The incredulous chorus wore on, despite the evidence of my successful return from the trip with all my toes intact and my smiling face. It made me realize that we need to have a conversation about trail runners, so let’s talk about them.

What exactly is a trail runner? Imagine your favorite tennis shoe, but beefier. Trail runners are specifically designed to offer better support, stability, and protection for your feet for off road adventures. Generally speaking, they offer better traction, shield your feet from inevitable contact with rocks and other trail hazards, and have stiffer construction than traditional tennis shoes. They also often feature more rugged face fabrics that can also be waterproof so you can tackle varied terrain without worrying about tearing them up.

Although these shoes were designed with runners in mind, more and more hikers are taking to them for non-technical (or technical, all hail local legends Alex Borsuk and Stuke Sowle) trails. I have worn mine for trails all over the world and even summited Glacier Peak (via the Gerdine Ridge) without ever stepping foot in a boot. I love how lightweight and comfortable they are, and how easy they are to pack when traveling greater distances. I don’t pull on my boots unless crampons are required or deep snow beckons and my bunion thanks me for it.

That said, there are a few things to consider before you ditch your boots.

  1. Fit matters. Before you make a purchasing decision, visit your local outdoor retailer and talk to a fit specialist about the shoe that’s right for you. Make sure you tell them about any inserts you have, and your intended use of the shoes. Try them on, and don’t be shy about walking around the store in them.

  2. Start slow. If you’re accustomed to wearing boots, you’ll want to start by tackling some shorter trails so your ankles and legs have time to strengthen and adjust to the difference in support and fit. Don’t be afraid to load up your pack and hit your neighborhood trail or pound the pavement for a few days so you can get used to the difference.

  3. Consider your choice of socks. Even if you opt for a pair of shoes with waterproof fabric, trail runners are prone to getting wet if for no other reason than their height allows water to get in from the top as well as through any other non-waterproof parts. That’s okay, as many of them also offer fast drying features to keep your feet happy on multi-day treks. However, you will want to consider which socks you’re wearing. If I’m heading out for several days with a high chance of wet feet, I always wear wool shorties from Smartwool so my feet are warm even when wet. As much as I love my cotton KB socks from Costco, they have to go when it’s time to get after it!

  4. Check your route before you go. As much as I love my trail runners, I am also aware of their limitations. While they have served me well for easy scrambles and long walks in the mountains (I logged 150+ miles in a month in the Himalayas in my latest pair), they aren’t a perfect substitute for boots in every situation. When steep snow and ice beckon, it’s boot time. Do your research, make smart decisions, and come home with happy feet!

As a final note, I want to briefly highlight another important aspect of this conversation: money. Often, we get caught up in the idea of the things we think someone needs to get outside successfully, when in reality we need much less to safely, successfully achieve our goals. When this happens, we run the risk of perpetuating some classist, gatekeeping ideologies and that’s not a cute look on anyone. So, the next time you catch yourself wanting to criticize someone for their choice of gear, take a step back and consider if you’re offering objectively sound advice, or if something else is at play.

Stay safe out there, friends. Happy trails.

#LETSTALKABOUT Crag Etiquette and Transitioning from the Gym

Here in the PNW, the dry(ish) days have arrived and climbing season is in full swing. If you’re just getting your toes wet in the world of outdoor climbing, here are a few tips to keep in mind as you hit the crag.

Matt Fineman on Chain Reaction at Smith Rock

Matt Fineman on Chain Reaction at Smith Rock

  • Sharing is caring. Whether you’re climbing with a big group or working your project solo, it’s important to make space for other people. Of course, there are some nuanced points here depending on the discipline of climbing you’re engaging in so let’s unpack this a little:

    • Bouldering: whether you’re set up and working a project or approaching an established group to give it a go, consider these things:

      • offer to share your pads, especially if additional protection will make for a safer landing.

      • brush holds between burns (attempts to climb the problem) so the next person can give it a go without greasing off and let other folks work in while you rest.

      • whatever you do, make sure you’re paying attention to where you’re climbing and sitting to avoid falling-related accidents.

    • Single pitch climbing:

      • It can be frustrating to arrive at a wall to find ropes on a lot of routes with no active climbers. If you’re going to put ropes up, be conscientious and considerate about it. Don’t hog the most popular routes on a wall and make sure you’re being flexible and communicative with other parties. For example: you want to keep a top rope (TR) on a route for a member of your party who isn’t ready to climb and someone else wants to give it a burn. No worries—simply communicate the issue to them and sort it out. Perhaps they are happy to take a TR burn. Perhaps they want to lead it but would be happy to tag your rope up and set it up for your friend. Either option is a great solution, you just need to chat it out.

      • Pay attention. If you’re gearing up to climb, take stock of your surroundings. Does the route you’re hopping on cross above or below someone who’s already climbing? Is there a shared anchor with a rope already on it? Check it out, then adjust accordingly to avoid accidents.

    • Multi-pitch climbing:

      • There are several things to be cognizant of when you’re getting on a multi, but I’ll focus on speed and environmental awareness to mitigate safety hazards.

        • Speed: if you’re on the wall and there’s a party that’s climbing noticeably more swiftly and efficiently than your party AND there’s a safe opportunity for them to pass, let them by. This will make the entire day run more smoothly and avoid traffic jams at belay and rap stations, which in turn prevents accidents. Further, pay attention to your progression throughout the day and make sure you’re on schedule. Rapping in the dark without headlamps and unexpected shiver bivvies aren’t that fun, I promise.

        • Environmental awareness: pay attention to what’s above and below you as you climb. Loose rock abounds and you’ll be managing ropes, gear, and other essentials. You don’t want to drop something or knock a block off onto your belayer or another party below you.

  • Hold the Spray:

    • Unless someone specifically asks for information about a route, don’t start spraying them down with beta (giving information about the climb) without asking!

  • Mind your gear:

    • While you’re at the crag, it’s important to keep your gear tidily organized and out of the way. This prevents accidents and gear mixups.

    • When you’re home, take care of your stuff. Check your ropes for any flat spots or core shots, inspect your pro (carabiners, quick draws, cams, etc), and make sure you’re storing all of your soft goods (harness, ropes, slings, etc.) away from hazardous chemicals that can compromise the integrity of the material. Remember, DEET eats through nylon so be particularly careful when using bug spray around ropes, harnesses, and other gear.

  • Be respectful: we share our crags with other recreational land users and in many areas, access is a sensitive issue.

  • Watch for rock fall:

    • If you see a block with an “x” on it mid-route, this usually indicates that the rock is loose and in danger of falling if you pull on it. Avoid doing so. As you climb, be aware of any loose or hollow sounding rock and avoid placing gear or pulling on anything that might come down. If you accidentally pull something off the wall, yell “ROCK” as swiftly and loudly as possible. Encourage your belayer to use a helmet and stay safe.

  • Triple Check your knots:

    • Develop a consistent method for safely tying in, belaying, building anchors, and cleaning them. Use it every time until it’s second nature. Communicate it to your partners and triple check yourself and others before you climb. Safety first.

  • Get involved! There are so many ways to give back to the community, from mentoring to trail work to donating time, money, and effort to rebolting and other safety projects! Reach out to local climbing and land management agencies to inquire how you can help!

  • If you see something, say something.

    • If you notice an objectively unsafe situation occurring, don’t be afraid to approach and offer some kind yet firm feedback. Check yourself before you approach and consider this: is the situation objectively unsafe or is it a matter of personal preference? If the latter, perhaps it’s best to leave it be! Unsure? Check in with your crew.

Other suggestions? Let’s hear them!


#LETSTALKABOUT Health Checks


A few weeks ago I took some new friends into the backcountry. Temps were low, snow was forecasted, and I was stoked. In my excitement, I forgot to ask a critical question that’s standard for me: “do you have any health issues I should know about?”

Photo Jan 15, 8 57 49 AM.jpg

It turns out that someone in our group did, which lead to some unexpected complications on the trail to the point where I was calculating contingency plans and landing sites for helicopters should we need to call for help.

Thankfully, we got everything under control and made it home safely. It was an important reminder for me and I wanted to share it here with you all.

Gathering medical information before a trip into the backcountry is always a good idea. If someone has a condition that they share with you, make sure you talk about potential issues that might arise as a result given the difficulty of the trail and the weather. Make sure you know where their medicine is if they take any and how to administer it. If you can, make sure you have a PLB or satellite communication device (we always carry our Garmin Explorer+ with us) so you can call for help if things take a turn for the worse.

Remember to have these chats calmly and with kindness; the last thing we want is for the person to feel stigmatized or discouraged or to perpetuate ableist ideas and behaviors. If they think they are capable of the adventure, respect their bodies, boundaries, and self-knowledge. Don’t patronize, just carry on with your badass selves knowing you’re ready to act if something comes up!

Stay safe out there, friends!

Questions, Comments, or Concerns? Let me know!

#LETSTALKABOUT Cold Weather Sleeping Tips

Now that we have covered sleeping bags and sleeping pads, it’s time to talk about some general tips for staying warm when the temps drop!

Photo Jun 02, 10 32 46 AM.jpg

Here’s the scenario: you’re in the backcountry, tucked into your sleeping bag, and you just can’t warm up. What do you do?

  1. Eat something fatty, sweet, and delicious: introducing a pop of sugar into your system will heat you up. It’s not a sustained burn, but the extra warmth can be enough to make a significant difference.

  2. Layer spare clothes, emergency blankets, socks, gloves, and other items under your sleeping pad. Try to keep it as even as possible for obvious reasons--you don’t want to get warm only to sleep on lumps and bumps! Any additional insulation between you and the cold or frozen ground will give you a boost in warmth. If you can, add a little additional layer where your hips, butt, and feet touch the ground.

  3. Stuff extra clothes and soft goods into your sleeping bag to take up empty space. The less air pockets there are, the less heat you have to generate to warm them up.

  4. Take any extra puffy jackets or vests you might have and zip them around your feet for toasty toes.

  5. Fill a nalgene or water bottle with boiling water and put inside your sleeping bag. Make sure it’s FULLY closed first--the only thing worse than being cold in the alpine is being wet and cold in the alpine!

  6. Wiggle! Don’t go too hard or you’ll end up sweating, but wiggle just enough to generate a little extra heat!

Things to consider:

One of the best ways to avoid the above scenario is by preparing for bedtime carefully. This means going to bed warm, but not sweaty. It means changing your wet, sweaty clothes out for a designated dry pair before bed, when space in your pack allows. It means keeping a clean, dry pair of socks in your sleeping bag and never letting them leave the tent. More on all of this later!

What are your favorite tips and tricks for staying warm? Let’s hear them!


#LETSTALKABOUT Sleeping Pad Ratings

Now that we have chatted about sleeping bag ratings, it’s time to hit on the next piece in the comfort quiver: your sleeping pad!

Photo Oct 22, 4 44 24 PM.jpg

Whereas sleeping bags are given an EN/ISO rating, sleeping pads get an r value that indicates their thermal resistance. The higher the number, the warmer the pad will keep you! It’s important to note that unlike the EN/ISO rating, there isn’t (yet!) a standardized testing procedure for assigning r-values. Some brands conduct rigorous internal testing, others simply guesstimate based on the available data. Do your own research on the brand before taking the rating they give their product at face value.

Let’s begin talking about the practical application of r-values by thinking of them as stand alone pieces. The following table lays out recommend r-values for different climates:

r-val-scale.gif

This is a helpful starting point for thinking about climate, warmth, and what sleeping pad you want to bring with you.

Now, let’s think of your sleeping pad as part of a sleeping system that’s comprised of your pad, your sleeping bag, and the clothes you are wearing. Each part of the system has a different temperature rating, with pros and cons depending things like size, weight, packability, durability, and so on. You can play around with these variables for each adventure to balance things out. For example: let’s say you’re on a fall alpine adventure and the temps are expected to drop into the frigid. You don’t want to carry your massive 0 degree sleeping bag and you have an ultralight sleeping pad with an r value of 5.7. In this situation, you can likely forego the heavier bag for something lighter and rely on the warmer pad and some solid base layers to keep you toasty. If weight isn’t an issue, as with car camping, you have even more room to play.

Things to consider:

  1. As with sleeping bags, these recommendations are based on the mythical “Average Person” and what works for someone else may be a poor fit for you. If you can, rent or borrow sleeping pads from friends or local gear outfitters before investing and see what works for you. The higher the r-value or the lighter the pads get, the pricier they tend to be so a little field research is a wonderful thing.

  2. You can stack pads for cumulative warmth! A popular combination is using a lightweight closed-cell foam pad, like the Therm-A-Rest SOLite under your usual pad. It’s relatively light, relatively inexpensive, and textured enough to prevent slippage when stacked beneath your other pad. With an r-value of 2.8, it’s an easy boost to your sleeping system if you can spare the space for an additional pad.

There you have it, a basic run down! Questions, comments, or concerns? Let me know!

#LETSTALKABOUT Trip Reports

So you hit the trail on a whim, something has gone wrong, and no one knows where you are. What do you do? Let’s rewind for a second and talk about one of my essential pre-adventure items: the trip report!

Photo Oct 18, 5 28 09 PM.jpg

I make a habit of sending a pre-trip report to my trusted friends and family on every adventure, though I might skip a few details for more casual adventures. I definitely send the full list for anything I know is pushing my limits or involves greater objective risk and technical skills. That way, should something go wrong they will know where I am and have enough information to help me get the help I need.

Information to include:

1. Name of all persons in your party.

2. Destination, including the route you’re traveling by if there are several options.

3. Date and intended duration of your adventure.

4. Expected return time. I also include a margin of error. Example: “I should be back around 6pm but no need to worry if you haven’t heard from me by 10pm.”

5. When your friend should sound the alarm if you haven’t returned. Example: “I anticipate getting back Sunday night at 6pm but in case we are slow or need to sleep in the car at the trailhead, please call SAR if you haven’t heard from us by 8am on Monday.”

6. Description and license plate of the car(s) you’ll be taking.

7. Jacket and backpack color of party members.

8. Emergency contact info for all other party members.

9. Any known medical conditions. For example, if someone is medicine-dependent, that’s a good thing to list in the event of an emergency. First responders can show up prepared.

If all goes well, no one will ever need this information! But, it’s always good to plan ahead, especially when shifting weather conditions can hit you hard in the middle of a climb. It will also empower your loved ones to make informed decisions should they ever need to call SAR for you.


POST TRIP REPORTS!

We all love these! Whether you file on your local trail site, summitpost, peakbagger or somewhere else, please share the details of your trip! Were conditions perfect? We want to know! Are there downed trees, road closures, or unexpected hazards? We want to know! The more info and pictures, the better!

Questions, comments, additions or concerns? Let’s hear them!

#LETSTALKABOUT Sleeping Bag Ratings

So you’re packing for your next adventure and it’s time to grab a sleeping bag. How do you decide which bag to take? Enter the handy dandy but oh-so-confusing EN* rating, adopted by virtually all major sleeping bag manufacturers beginning in 2005.

Photo Jun 02, 10 32 46 AM.jpg

The ratings are given after 3rd party labs conduct rigorous, standardized tests before arriving at a temperature range for the “average” person. Bear in mind that these ranges assume the use of a hat, gloves, base layer, and basic foam sleeping pad. Gender specific** bags assume that men sleep warmer than women, so bear that in mind if you’re buying  The high end is the comfort rating. This means that the average person will be comfortable in the bag at the given temperature, snoozing away into the night. The mid-range of these temps will likely find the average person shivering, at least for a while, before they generate enough heat to stay comfortable through the night. The low end is the danger zone. In these temps, the bag may prevent you from death or very serious complications but you may suffer from frostbite or hypothermia. It should go without saying that you should not plan on taking your bag into these conditions--this is more of an “in an emergency situation you (probably) won’t die if you have this bag” rating.

All of that said, remember that this is based on averages. You may run hotter or cooler than the average person, and that will in turn affect your comfort and safety on the trail. I like to play it safe by selecting a warmer bag, especially for longer, colder adventures where weight isn’t a consideration. It’s easy to unzip or delayer if I’m too hot, but I can’t add layers or warmth that I didn’t bring with me and cold camping hacks like the trusty Nalgene full of boiled water and eating carbs before bed will only get you so far.

Things to consider:

  • The warmer and lighter the bag, the more expensive it’s likely to be. Choose wisely, and check to see if you can rent a bag to test it out before you buy. It’s also worth checking your local used gear store for a returned or consigned item. One good launder and it’s basically new!

  • Sleeping bag liners: though some question their efficacy, I have used a fleece liner to great effect on colder nights! Bonus points: they keep the inside of your bag cleaner and are very easy to wash.

  • Backcountry pajamas: the clothes you’re sleeping in matter. Where possible, have a clean, dry set of pajamas (socks, base layer, hat, midlayer for extra warmth, down booties, etc.) that are reserved for sleeping only.

Questions, comments, concerns? Let me know!

*This system was updated in 2017 to include an ISO rating and technically it’s the EN/ISO rating but that’s a long name that I don’t want to type twenty thousand times.

**I know, I know. WHY!


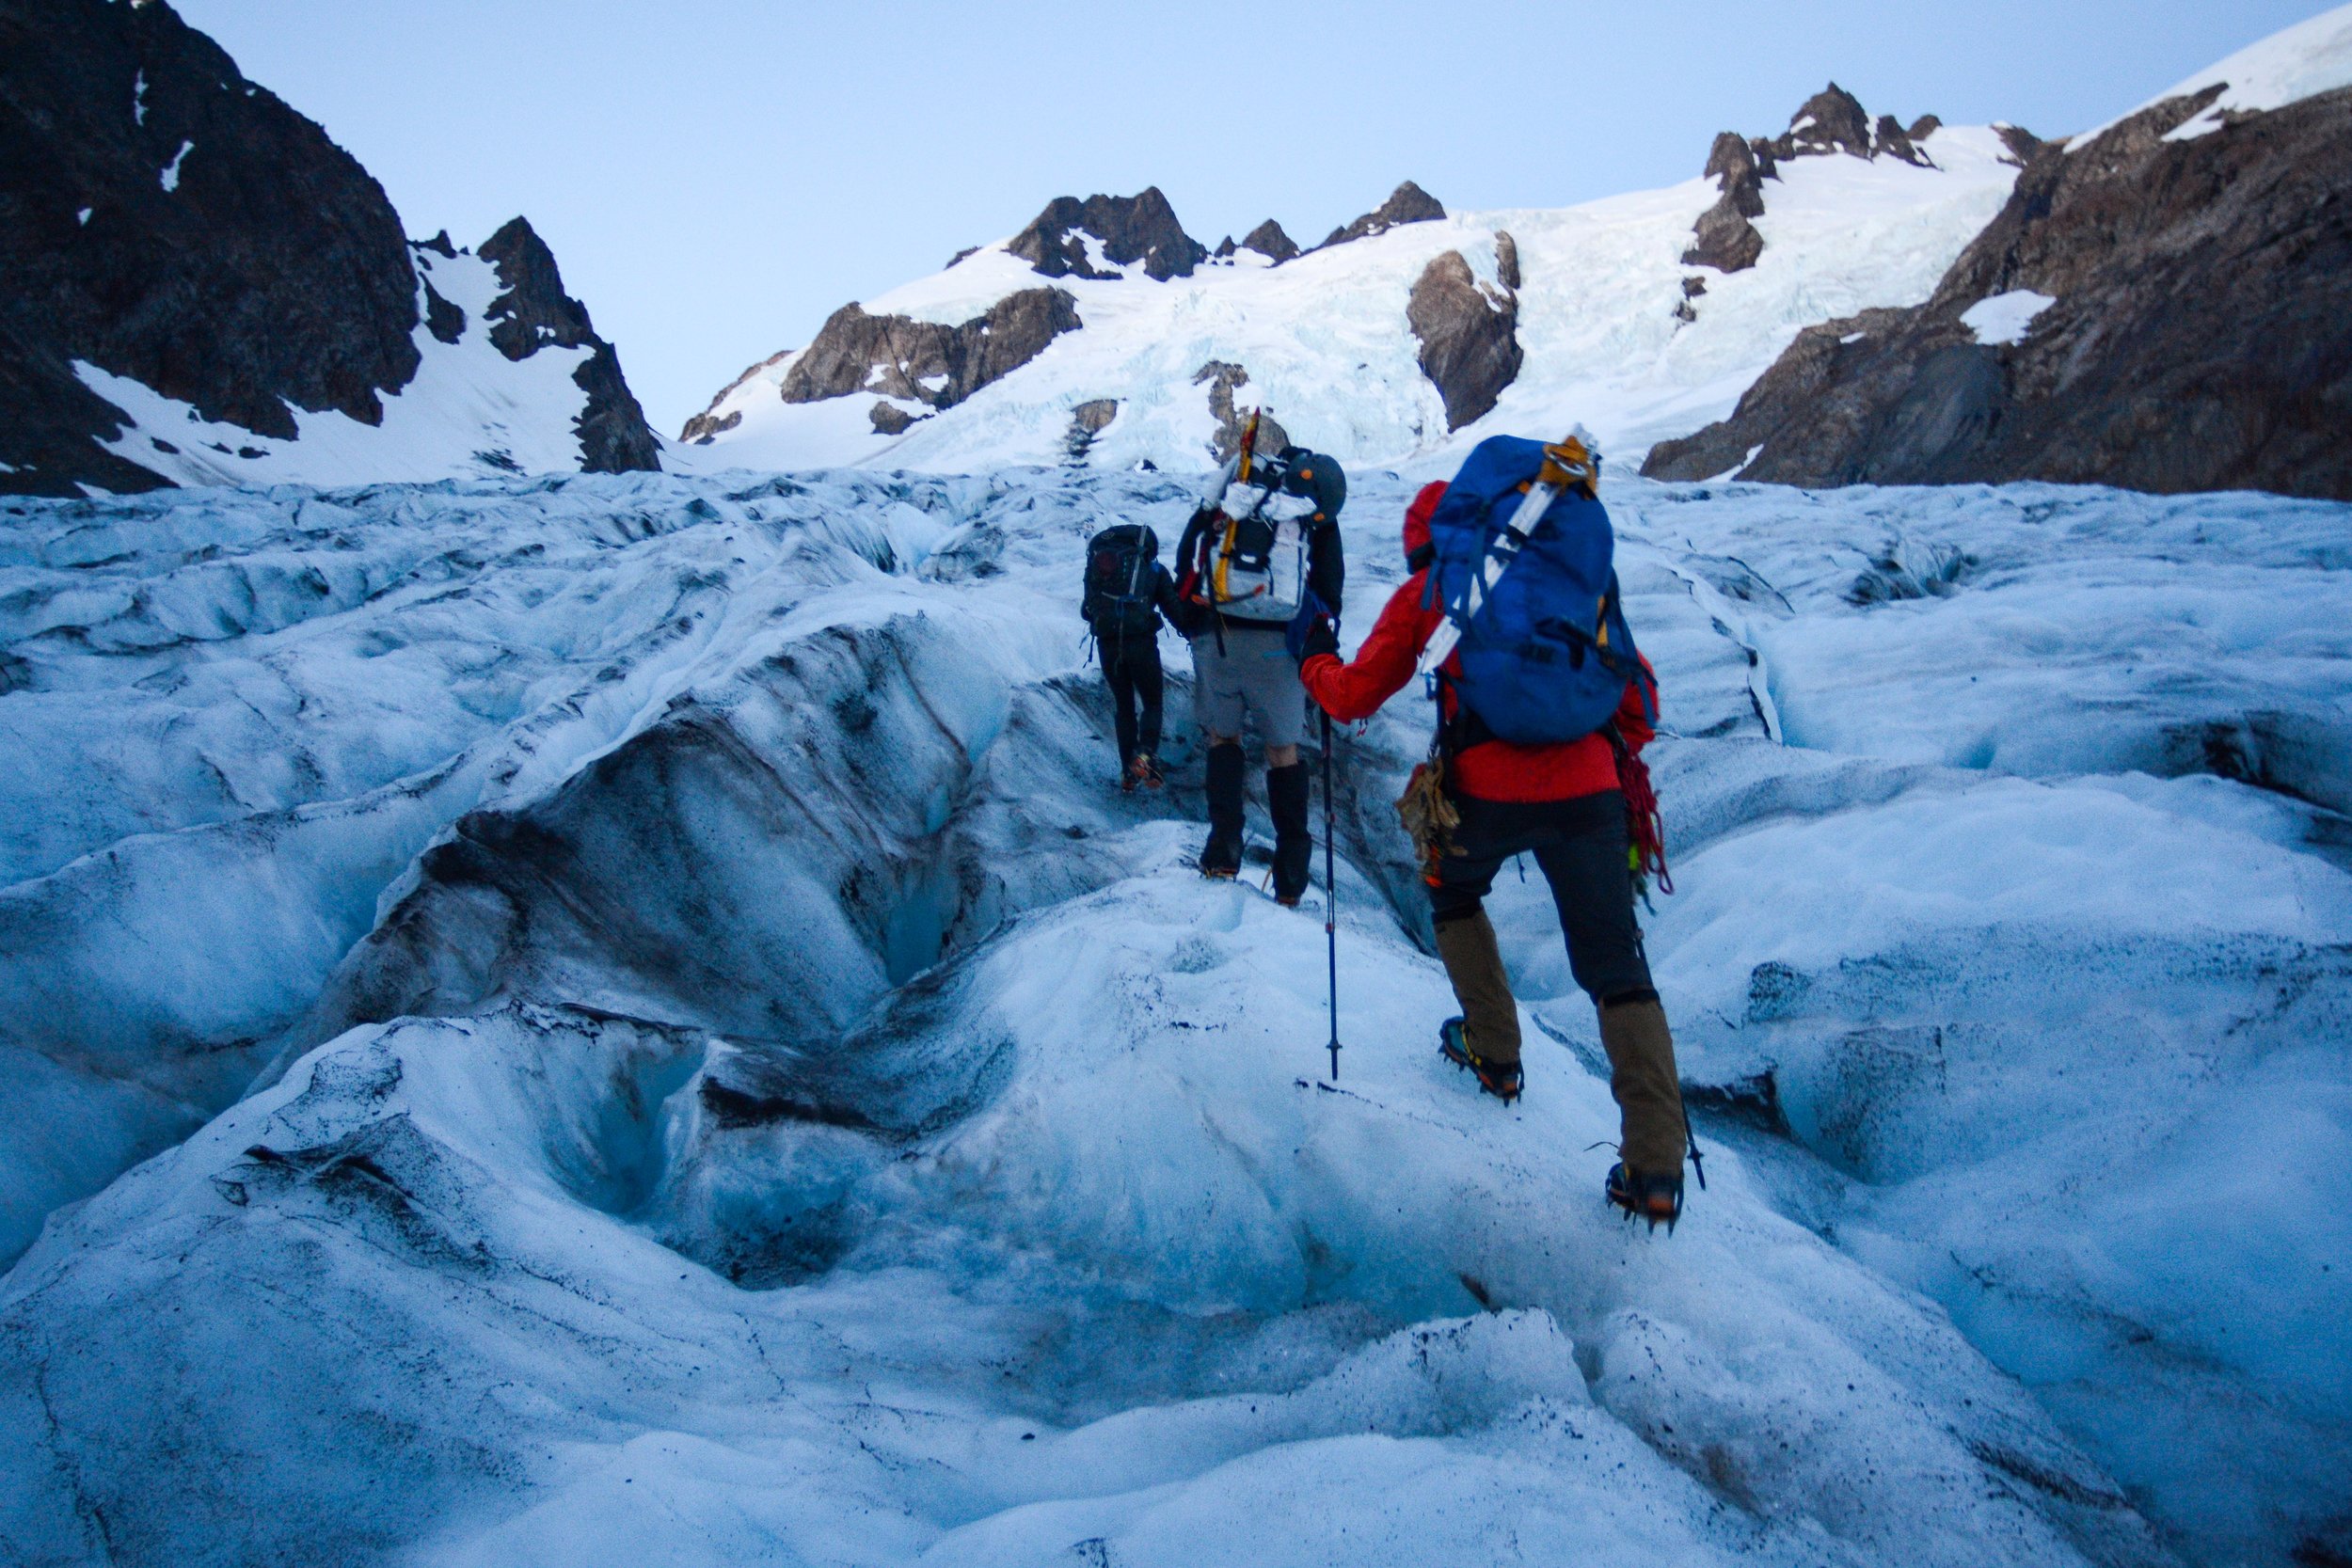
#LETSTALKABOUT Crampons & Microspikes

This question comes up every year: do I need crampons or microspikes? Here's a handy list of things to consider to help you decide.

Photo Aug 29, 12 36 52 PM.jpg

CRAMPONS
Will you be:
-traversing a glacier or thick ice deposit?
-ascending steep terrain (think snow and ice over 25 degrees of slope)?
-ascending or traversing terrain where a fall due to slipping would be catastrophic?
-ascending or traversing terrain where an ice axe is mandatory?

If you answered yes to a lot of these questions, it's likely that you need crampons.

Things to consider: if the terrain/adventure demands crampons, am I fully prepared with the rest of the gear and skills to safely undertake my journey? Have I made certain that my crampons are compatible with my footwear and fit them before hitting the trail? Click here for a helpful guide to choosing crampons.

MICROSPIKES
Will you be:
-traversing low angle patches of ice (less than 20 degrees)?
-traversing hard packed snowy areas?
-on variable terrain where ease of taking on and putting off is crucial?
-traveling faster/lighter so weight is a consideration?

If you answered yes to a lot of these, microspikes are a great traction option. They are relatively light, inexpensive, easy to take off and on a variety of footwear, and don't require any special skills to use. I’m personally a fan of the Kahtoola brand as I find them to be the most durable of the options!

Things to consider: As annoying as transitions are, taking these off as you traverse rocks and mud will prolong their life and keep them sharper. Not suitable for terrain over 20 degrees of slope.

SNOWSHOES
Will you be:

-traversing heavily snow-covered areas with angles of slope up to 25 degrees?

If the answer is yes, snowshoes can be a great option that combines floatation with traction, though the options vary by brand.

Things to consider: snowshoes are significantly more expensive than the other options, so choose wisely. Click here for some options! If you plan on tackling any elevation, opt for a pair with teeth and ascender bars to assist on the incline. Snowshoes without any form of teeth or traction on the bottom are ineffective on ice, so please be cautious.

YAK TRAX:

Yak Trax are an affordable option but they have limited efficacy. Useful for firm snow on flat surfaces so an idea option if you live in an area with snowy sidewalks, etc. Unfortunately, not a great option for steeper terrain so keep these babies tucked into your car or house and grab something a little more stout when you hit the trail.

TREKKING POLES

A non-standard traction device that is an essential part of my winter gear kit. Poles will help you control steps and slides as you tackle the trails this winter. I highly recommend snagging a pair no matter what activity you undertake!

Questions, comments, additional thoughts? Let's hear them!

#LETSTALKABOUT Trip Plans + Winter

Winter hasn’t even begun and I have already spent several nights camping in the snow! Now is a great time to think about trip planning in light of the snow and weather changes!

Photo Dec 08, 8 47 20 AM.jpg

As a general rule, I expect adventures to take twice as long when the bad weather, snow, and shortened days set in. You never know when you’ll encounter trail hazards like fresh snow or ice that will require additional time and attention to navigate through safely. Give yourself plenty of room for summit snacks and a safe return!

Accordingly, I pick trails and destinations differently, either opting for shorter trails (roughly 1/2 to 2/3 the distance I would go for on a summer day) for day hikes or making sure I’m extra prepared with warm layers, light sources, and so on if I still want to get after it.

Other things to consider:

1. Check your local trail resource for condition updates and road closures. If you’re in Washington State, WTA can’t be beat for most places!

2. Be Avalanche Aware. Snow is building and that means it’s time to download the NWAC app if you haven’t already and use it religiously. I highly recommend attending one of their free seminars and seeking further education if you plan on spending any time in the Cascades this winter. This advice applies to every other area in the world with avalanche terrain: seek out quality information about safety and avalanche conditions. Whether you’re snowshoeing, skiing, sledding, boarding or otherwise, odds are good you’ll be in avalanche terrain at one point or another. Knowing how to identify it and how to choose safe terrain based on the Avalanche forecast for the day can save your life.

3. Make sure you have your 10 essentials, adjusted for the colder weather. For example: my winter layers are beefier than my summer layers and I tend to carry more food. I also carry microspikes for pretty much everything now that it’s getting colder. They can save you from broken bones and bruises when it gets icy out.

4. Double check your footwear. I’m a huge fan of trailrunners for everything I can get away with but when snow builds and it gets icy, I switch to a waterproof option with better traction. Pair with some good wool socks and my toes stay happy!

5. Double check road conditions and opt to carpool with friends who have chains, 4WD, or AWD vehicles if possible. Some locations like highway passes and national parks require specific traction devices so know before you go and plan accordingly.

6. Don’t forget to file a trip report with family or friends before you hit the trail!

7. Don’t be afraid to tote along some hot treats like a thermos of soup or cocoa!

Other tips and tricks? I would love to hear them!